
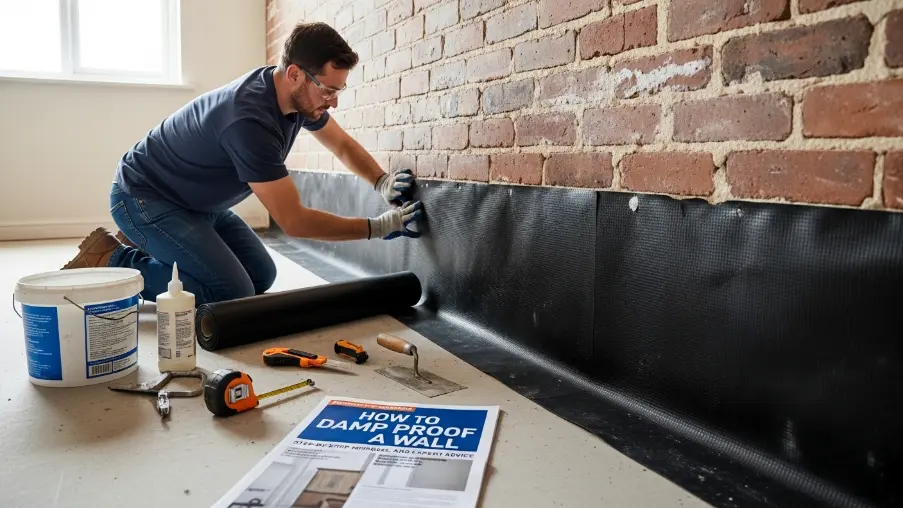
That dark patch at the base of your living room wall, the white salt crust on the brickwork, and the persistent musty smell are not cosmetic issues you can paint over and forget.
Damp in a property gets progressively worse without the right treatment, and most DIY attempts fail because the diagnosis is wrong before a single product is ever opened.
At SDM Interiors in York, our team has treated damp across hundreds of North Yorkshire properties.
In this guide, our experts explain how to damp proof a wall effectively, from identifying the correct type of damp through to specific methods for brick walls, single skin walls, and internal walls.
What Is Damp Proofing?
Dealing with a damp home can be incredibly stressful for any property owner. It is easy to feel overwhelmed when you notice a cold, wet patch spreading across your plasterwork.
Many people rush to buy a quick-fix sealant from a DIY store, but covering up the damp without understanding how a house handles moisture will always lead to long-term failure.
To solve the problem for good, you need to understand the structural systems designed to keep your home dry. At its core, damp proofing is the term for the specific methods and materials used to stop moisture from entering or building up inside a property.
The system relies on two main components working together to protect your home. Here is what they are and how they keep the moisture out:
Damp Proof Course (DPC): This is a horizontal layer of waterproof material built into the base of your walls. It usually sits about 150 millimetres above the outside ground to stop water from climbing up the brickwork.
Modern vs. Old DPCs: New builds use thick plastic strips that last a lifetime. Older properties in York often rely on original Welsh slate or bitumen felt barriers, which can easily crack, shift, or fail after a century in the ground.
Damp Proof Membrane (DPM): While a DPC protects your walls, a DPM is a massive waterproof sheet laid flat under your concrete floors. It stops groundwater from being pushed upward through the floorboards by natural pressure.
A huge portion of York’s housing stock consists of Victorian terraces and older stone buildings. Many of these properties were either built before DPCs became law, or the original materials have completely broken down over the decades.
Our guide to what is damp proofing covers the background and building science in more detail.
The 3 Types of Damp: Identify Yours Before You Do Anything
Correct diagnosis is the single most important step in damp proofing a wall. The three types of damp in UK properties look similar on the surface but have completely different root causes and completely different treatments.
The wrong solution wastes money, time, and in some cases makes the underlying problem measurably worse.
The three types are rising damp, penetrating damp, and condensation.
If moisture forms on the outer face of the foil, the side facing the room, the problem is condensation. If it forms on the back face pressed against the wall, the moisture is coming from within the wall structure itself, pointing to rising damp or penetrating damp.
The table below maps all three types against their signs, causes, and correct treatment direction. Read it carefully before purchasing any product or picking up a tool.
| Type of Damp | Where It Appears | Tell-Tale Signs | Root Cause | Treatment Direction |
|---|---|---|---|---|
| Rising Damp | Base of ground-floor walls; rarely above 1 metre | Horizontal tide marks at a consistent height; white salt deposits (efflorescence); damp or rotting skirting boards; plaster soft and peeling at floor level | Failed, bridged, or absent damp proof course (DPC); groundwater rising via capillary action through masonry | Chemical DPC injection plus salt-resistant renovating plaster |
| Penetrating Damp | Any height on external-facing walls; seasonal and weather-related | Damp patches linked to rain; worsen after wind-driven wet weather; near window frames, roof junctions, or mortar joints | Cracked render, failed pointing, damaged flashing, blocked guttering, or structural gaps allowing direct water ingress | External repair first (repointing, rendering, flashing); then internal drying and treatment |
| Condensation | Corners, cold spots, ceilings, window reveals, external-facing walls | Black mould growth in corners; water droplets on glass; persistent musty smell; worst during cold months | High indoor humidity from cooking, bathing, and breathing; cold surfaces; poor ventilation or insufficient heating | Better ventilation and heating; thermal insulation; anti-condensation paint; not a DPC injection |
One point from the table is worth highlighting before moving on. A waterproof coating applied to a wall where the problem is condensation does nothing useful. A chemical DPC injection on a wall suffering from penetrating damp caused by a cracked render wastes both money and time.
Every treatment decision flows from the correct identification of the source.
Damp Proofing Methods: Which One Matches Your Problem?
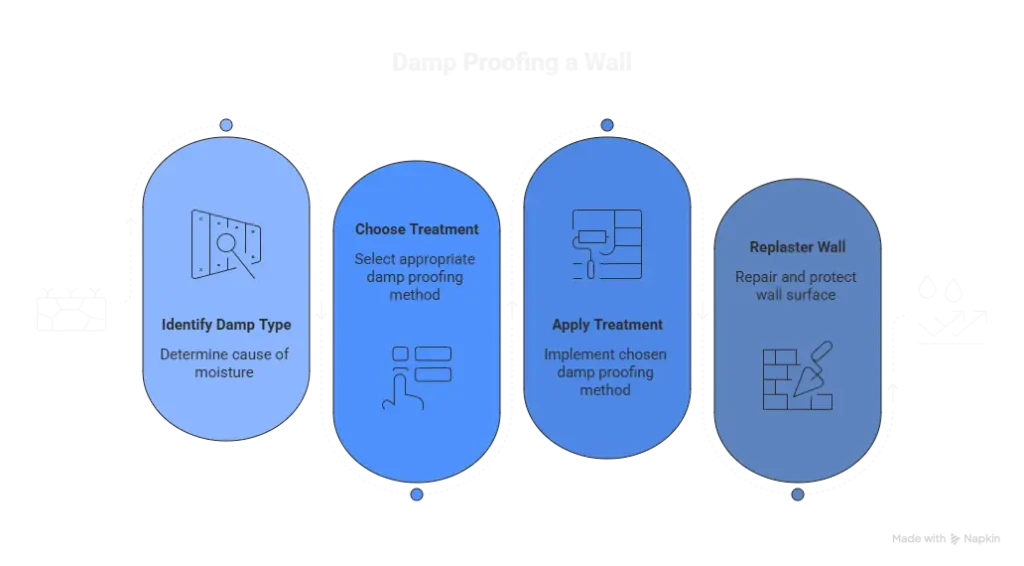
Once the type of damp is confirmed, the next step is selecting the right treatment method. Several approaches exist, ranging from straightforward surface applications to more complex structural interventions. The right choice depends on the damp type, the wall construction, and the severity of the problem.
The table below covers every major method.
| Method | What It Treats | DIY Possible? | Approx. Cost | Longevity |
|---|---|---|---|---|
| Chemical DPC injection | Rising damp | With limits | £50-£75/m (pro); ~£100 DIY kit | 20-30 years with correct installation |
| Tanking slurry | Penetrating damp; below-ground walls | Yes, with care | £30-£40/m2 (pro); £12-£18/m2 (DIY) | Long-term, if applied to a prepared surface |
| Cavity drain membrane | Severe penetrating damp in basements | Professional advised | £2,500-£10,000+ per room | Permanent — manages ongoing water entry |
| Silicone masonry cream | Penetrating damp on external walls | Yes | £20-£35/m2 (pro); £6-£15/m2 (DIY) | 10-15 years |
| Repointing | Penetrating damp via mortar joints | DIY-friendly | £20-£40/m2 (pro); £5-£10/m2 (DIY) | 20+ years |
| Waterproof render | Penetrating damp on external walls | Pro for large areas | £40-£70/m2 (professional) | 20+ years |
| Damp-proof paint | Condensation; minor surface damp | Yes | £6/litre (DIY); ~£50/wall (pro) | 5-10 years; surface treatment only |
A note on cost ranges: these figures reflect UK market rates for 2025 and 2026. Professional costs include labour, materials, and in most cases, a written guarantee. DIY costs cover materials only.
The most significant cost variable in most rising damp jobs is not the DPC treatment itself but the replastering work that must follow it. That stage typically accounts for 40 to 60 per cent of the total project cost, and it is the step most often underestimated or skipped entirely.
Now comes one of the main parts, how to damp proof a wall step by step.
Tools and Materials You Will Need to Damp Proof a Wall
Before starting any damp proofing work, having the correct materials ready saves time and makes the job more likely to last.
The list below covers what is needed for the most common DIY damp proofing treatments on walls in York and North Yorkshire properties.
- DPC cream or liquid (silane or siloxane-based): The core product for chemical DPC injection and external water repellent treatment. Available in 600ml cartridges for injection guns or in 5 to 25 litre tubs for brush or roller application to external masonry.
- Damp proof cream injection gun: A heavy-duty mastic gun adapted for DPC cream cartridges. A standard caulk gun does not provide sufficient pressure for proper injection work.
- SDS rotary hammer drill with 12mm to 16mm masonry bits: For drilling injection holes to the correct depth and at consistent spacing. A standard drill lacks the power and precision needed for this work over a full wall length.
- Tanking slurry: A cementitious waterproof coating mixed to a thick slurry consistency. Required for treating walls from the inside or for below-ground waterproofing. Applied in two coats to the bare wall surface.
- Salt-resistant renovating plaster or render: The only suitable product for replastering after a rising damp treatment. Standard gypsum plaster absorbs hygroscopic salts and fails. This is a non-negotiable material specification.
- Long-pile roller and stiff brush: For applying silicone cream to external masonry. A brush works the product into recessed mortar joints more effectively than a roller alone.
- Bolster chisel, club hammer, and stiff wire brush: For stripping old damp-affected plaster from the wall back to bare brick before replastering.
- Pin-type damp meter: A basic moisture meter costs under £20 and gives actual moisture readings before and after treatment. Useful for confirming the extent of the damp area and monitoring progress.
- Bonding agent (diluted PVA or acrylic primer): Applied to bare brick before renovating plaster to improve adhesion and even out suction variations across the wall surface.
- Safety gear (FFP2 dust mask, safety goggles, chemical-resistant gloves): Required for all chemical injection work, plastering, and stripping of old plaster that may contain historic contaminants.
Now, let’s see the exact steps of how to damp proof a wall from scratch.
How to Damp Proof a Wall: Step by Step
The core process for damp proofing a wall follows the same sequence regardless of the wall type. Brick walls, single skin walls, and internal walls all move through these same stages.
The differences between them come down to product choice and drilling depth at step four, not to the overall method.
1. Confirm the type of damp before buying anything
Rising damp, penetrating damp, and condensation each require a different treatment. Most treatments that fail do so because the diagnosis was wrong before the first product was opened.
Use the foil test described earlier, or a moisture meter, to confirm your findings before spending a penny.
2. Fix any external source first
For penetrating damp, repoint failed mortar joints, repair cracked render, clear blocked guttering, and fix damaged flashing around windows or roof junctions. No internal treatment will hold if moisture is still entering through an unrepaired defect outside.
3. Strip all damp-affected plaster back to bare masonry
Use a bolster chisel and club hammer. Strip from floor level to at least 300 millimetres above the visible tide mark. This step is required for any rising damp treatment and for any wall where plaster has been saturated for a significant period.
4. Apply the correct treatment
For rising damp, drill into the mortar joint at 150 millimetres above ground level at 120-millimetre intervals and inject a silane-based DPC cream using an injection gun.
For single skin walls, reduce the drilling depth to around 80 to 90 millimetres.
For penetrating damp on external walls, apply two coats of silicone masonry water repellent cream by brush and roller. For internal walls with persistent moisture, apply cementitious tanking slurry in two continuous coats directly onto the bare masonry surface.
5. Allow the treatment to cure fully before moving on
Chemical DPC cream requires a minimum of 24 hours before replastering and takes around four weeks to reach full cure. Silicone cream needs 48 to 72 hours. Tanking slurry must harden completely between coats.
6. Re-plaster with a salt-resistant renovating render
Standard gypsum plaster is not suitable after any rising damp treatment. It absorbs hygroscopic salts remaining in the masonry and deteriorates rapidly. Salt-resistant renovating plaster is the only appropriate product at this stage, and skipping it is the single most common reason damp reappears after treatment.
7. Allow the new plaster to dry fully before decorating
A minimum of six to eight weeks in a well-ventilated room is standard. Paint applied over plaster that has not dried properly seals in moisture and causes early blistering and staining on the finished surface.
How Much Does It Cost to Damp Proof a Wall?

The cost to damp-proof a wall in the UK varies depending on the type of damp, the size of the affected area, the wall construction, and whether the work is done professionally or as a DIY project.
Condensation treatments are the least costly, typically involving ventilation improvements or anti-condensation paint. Rising damp and penetrating damp in older solid-wall properties sit at the higher end of the cost range.
Below you will find a cost breakdown of the damp proofing a wall:
| Method | DIY Materials Cost | Professional Cost | Notes |
|---|---|---|---|
| Chemical DPC injection | ~£100 per kit (5-6m coverage) | £500-£1,500+ per wall | Pro cost includes replastering; DIY carries no guarantee |
| Tanking slurry | £12-£18 per m2 materials | £30-£40 per m2 fitted | Wall prep and replastering add to the total cost |
| Silicone masonry cream | £6-£15 per m2 materials | £20-£35 per m2 applied | Two coats needed; cost-effective DIY option for external walls |
| Repointing | £5-£10 per m2 materials | £20-£40 per m2 labour incl. | Good DIY option for small areas; professional for large elevations |
| Waterproof render | £15-£25 per m2 materials | £40-£70 per m2 fitted | Surface prep and primer needed; professional finish recommended |
| Damp-proof paint | £6 per litre (covers ~12m2) | ~£50 per standard wall | Short-term only; does not address the underlying source |
| Cavity drain membrane | Not typically DIY | £2,500-£10,000+ per room | Best for basements; permanent solution with a drainage channel |
If you are comparing quotes from damp proofing contractors in York or North Yorkshire, check that each quote specifies exactly what is included in the replastering scope, which plaster product will be used, whether a written guarantee is provided, and the coverage period of that guarantee.
A quote that omits any of these details is worth querying before you sign.
Final Thoughts
A damp wall is not a problem that resolves with time or a coat of paint. Knowing how to damp proof a wall properly starts with getting the diagnosis right before any product is opened
Fix the root cause first, then replaster using the correct materials for your specific wall type.
For homeowners in York and North Yorkshire, older properties require extra care. You must consider wall breathability and salt contamination, which standard guides often ignore.If this guide helped you, please share it with a neighbour dealing with the same issue. We offer more practical advice on plastering, water damage repair, and period property renovation across our blog. Our York-based team writes every guide based on over 35 years of hands-on experience across North Yorkshire.


